An email hit your inbox sometime after July 1, 2026, telling you the SAVE student loan plan is dead and you have three months to deal with it. If you’re one of the more than 7.5 million people who were enrolled, that email wasn’t spam. Federal loan servicers started sending out that exact notice this summer, and each one starts a private countdown, 90 days to pick a new repayment plan, or your servicer picks one for you, and the one they pick has no income cap at all.
This isn’t a graduate school problem. SAVE was the plan that actually tied your payment to what you earned, so a lot of the people relying on it are working parents, teachers, and hourly employees whose loan payment finally matched their paycheck instead of competing with rent. That’s the protection that just ended.
The earliest anyone gets forced off SAVE is September 29, 2026, because your personal 90 days start the day your notice arrives, not on one shared deadline. Notices are still rolling out in waves through March 2027, so if yours hasn’t landed yet, it’s likely coming.
The court order that ended SAVE doesn’t care whether you’re ready for this. What matters now is what you do with the window you have left.
If your 90 days run out and you haven’t applied for anything, your servicer moves you automatically. Borrowers with loans from before July 2026 typically land on the Standard Repayment Plan, which splits whatever you owe into equal payments over 10 years and doesn’t ask what you make. Newer loans default to the Tiered Standard Plan instead, which runs on a fixed schedule of 10, 15, 20, or 25 years depending on your total balance.
Either way, the switch can be brutal for anyone who came out of SAVE forbearance owing $0 a month, which described a lot of borrowers. Billing resumes the moment your 90 days are up, with no extra grace period built in on top of that. Going from nothing to a fixed payment based purely on your balance, not your income, is exactly the kind of shock that wrecks a monthly budget if it catches you off guard.
Your 90 days are not the same as your neighbor’s
Every servicer is sending these notices on its own schedule, in waves that started July 1, 2026 and are expected to keep rolling out through March 2027. Your individual countdown begins the day your notice actually lands in your account, not on some single government deadline everyone shares.
That means the earliest wave of borrowers has to act by late September 2026, while people whose notices arrive later have more runway to plan. It also means there’s no single date you can circle on the calendar and assume you’re covered. Log into your loan servicer account and check the message inbox there now, since paperless notices tend to show up on the portal before anything hits your regular email. If you don’t want to wait to find out which wave you’re in, you can request a plan change yourself right now instead of waiting for the notice to arrive.
Interest has been piling up since before this notice showed up
Image Credit: Shutterstock
SAVE borrowers were placed into an interest free forbearance back in 2024 while the lawsuits played out, and for about a year nobody’s balance grew at all. That ended on August 1, 2025, when the Department of Education restarted interest accrual on every loan still sitting in SAVE forbearance.
None of that interest was charged retroactively, so nothing changed for the months before August 2025. But every month since then has quietly added to your balance, even while you weren’t required to make a single payment. If you’ve been assuming your loan balance is frozen because no bill has shown up, log in and check. There’s a good chance it isn’t frozen anymore, and the longer you stay in limbo, the more that balance grows before you ever make a payment toward it.
This matters no matter which plan you land on next. Whether you end up on a fixed plan or an income driven one, the balance your new payment gets calculated from already includes more than a year of accrued interest. Before you run any repayment calculator, pull your actual current balance from your loan servicer’s website instead of guessing based on what you remember owing under SAVE. That number has moved, and it’s the one your next payment will actually be based on.
The two plans actually worth your time
Income Based Repayment, or IBR, charges 10 percent of your discretionary income if you borrowed on or after July 1, 2014, or 15 percent if you borrowed earlier. Discretionary income is what’s left after protecting roughly $23,475 of earnings for a single borrower, so a lot of lower earners land at a $0 payment. Your IBR payment can also never run higher than what you’d owe under the 10 year Standard plan, and unlike some of the other plans, it isn’t scheduled to expire.
The new Repayment Assistance Plan, or RAP, works differently. It charges between 1 and 10 percent of your income, and knocks another $50 off your payment for every dependent you claim. Take an unmarried borrower with no kids, $35,000 in debt, and a $45,000 salary. Under the old income driven plans, that borrower owed $176 a month. Under RAP, the payment drops to $150, and the government waives $40 in interest and adds another $50 toward the principal every month, so the balance actually falls instead of creeping up.
If you’re working toward loan forgiveness, don’t sit on this
Image Credit: Shutterstock
Public Service Loan Forgiveness only counts payments made on a plan the government recognizes as legal, and time spent in SAVE forbearance never counted toward that progress while the plan sat in legal limbo. Every month you spent parked in SAVE waiting on the lawsuits added zero credit toward your 120 qualifying payments, no matter how long you’d already been working toward forgiveness before that.
Both IBR and RAP count toward PSLF, so the sooner you’re enrolled in one of them, the sooner your payments start counting again. Waiting out your full 90 days before applying just delays that clock further, and there’s no mechanism to backdate the credit once it’s lost.
Payments you made before the SAVE forbearance began are still on your record and haven’t disappeared. It’s specifically the frozen months since 2024 that added nothing toward your 120 payments, and that dead stretch keeps growing for every extra week you spend sitting on a defunct plan instead of switching. If you’re not sure how many qualifying payments you already have, your servicer’s PSLF tracking tool will show your running total, and it’s worth checking before you pick a new plan so you know exactly what you’re protecting.
A one point rate cut is sitting right there for the taking
Image Credit: Shutterstock
Borrowers with Direct Loans disbursed on or after July 1, 2012 can knock a full percentage point off their interest rate just by signing up for automatic payments. That’s four times the usual 0.25 percent auto pay discount, and it runs through June 30, 2028, but only if you enroll by September 30, 2026.
If you’re already enrolled in auto pay, you don’t have to do anything. Your servicer applies the bigger discount automatically. If you’re not enrolled yet, it takes a few minutes inside your loan account, and skipping it means leaving free money on the table at exactly the moment your balance is growing again.
If your loans are currently in default, this discount isn’t off the table, but it isn’t automatic either. You’ll need to consolidate your eligible loans and get into an active repayment plan first, then enroll in auto pay to start collecting the reduction. That’s an extra step, but it’s one worth taking before the September 30 cutoff rather than after.
What to do this week
Log into your loan servicer account today and check whether your 90 day notice has already landed, even if nothing has hit your email yet.
Run your numbers through the Loan Simulator at StudentAid.gov before you choose anything, since it shows real monthly payments for every plan side by side.
Apply for IBR or RAP as soon as you’re ready, rather than waiting for your deadline to get closer, especially if you’re chasing forgiveness.
Enroll in auto pay before September 30 if you haven’t already, so you lock in the bigger interest rate cut while it’s still available.
Bottom line
Image Credit: Shutterstock
Switching plans online takes about 10 minutes, and giving the government permission to pull your tax information straight from the IRS skips the manual paperwork entirely. Whatever plan you land on, apply before your window closes instead of after it. Undoing an automatic enrollment always takes longer than avoiding one in the first place.
Every real estate agent has a story about the couple who spent $30,000 gutting their kitchen expecting a windfall at closing, then watched the appraisal barely move. A few miles away, another homeowner spent under $5,000 on a new garage door and recouped more than double that at resale.
That’s not luck. The newest national renovation data puts a garage door replacement at a 267.7 percent return, higher than any other project tracked, including additions, full remodels, and new siding.
You don’t need a construction loan or a free summer to raise what your house is worth. You need to know which updates buyers actually notice and which ones just look expensive.
A garage door often makes up close to a third of a home’s front-facing exterior, so it carries more visual weight than most people give it credit for. The average project costs $4,672 and adds $12,507 in resale value, a 267.7 percent return that beat every other renovation tracked in the latest national data, for the second year running.
That return holds up because the logic is simple. A steel or insulated door installs in a day, doesn’t require permits in most areas, and instantly erases the most obvious sign of an aging exterior, a dented, faded, or mismatched door that photographs badly in listing photos. Buyers form an opinion of a house before they ever walk through the front door, and a scuffed garage door suggests the rest of the house has similar neglect, even when that isn’t true.
If your current door is more than 15 years old, has visible dents, or doesn’t match your home’s trim color, this is the one project on this list worth paying a professional to install correctly. Get a few local quotes. Prices vary more by region than almost anything else here, and a fast, clean install counts for more than the brand name on the door.
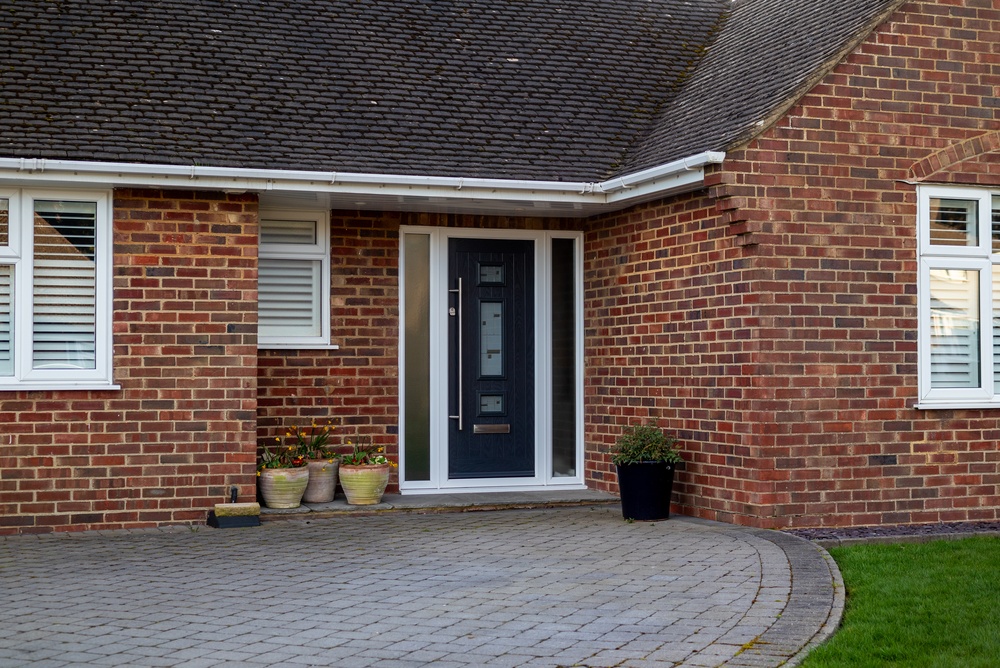
Put in a new steel front door
Image Credit: Shutterstock
A steel front door is the only project in recent realtor survey data that recovers 100 percent of its cost when the home sells, and it isn’t the most expensive option on the list. The typical steel entry door replacement runs $2,435 and adds about $5,270 in resale value, a 216 percent return.
Steel doors resist warping, dents, and the sun damage that turns a wood door gray and cracked within a few years. Fiberglass costs more upfront but mimics a wood grain finish if that matters to you. Either way, the jump from a hollow, builder-grade door to a solid one with a proper deadbolt and updated hardware changes how the whole entrance reads, for less than most kitchen appliance packages cost.
Measure your existing frame before you shop. Most residential entry doors are a standard 36 by 80 inches, but older homes sometimes deviate, and a custom size adds real money to the project. Pair the new door with fresh trim paint and you get an entrance that looks like it belongs on a house worth more than yours currently appraises for.
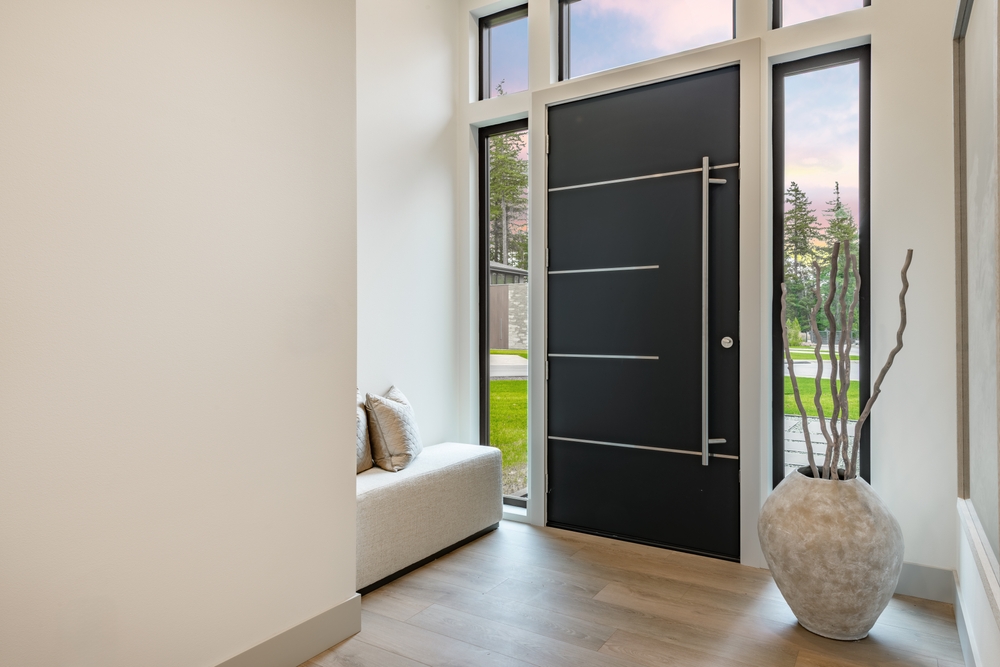
Paint the front door black
Image Credit: Shutterstock
Paint color on a single door sounds like a minor detail, and it costs next to nothing, but it’s one of the more surprising findings in recent buyer research. Homes with a black front door have sold for $6,450 more than comparable homes with other door colors, and black was the only shade that showed that effect.
Gray, the color that dominated builder palettes for the past decade, actually underperforms compared to almost every other option, including plain white. Nobody has fully explained why black works this well, though real estate agents tend to point to the sense of intention it conveys. A black door reads as a design choice rather than a leftover default.
This is a weekend project with a can of exterior-grade paint, painter’s tape, and a few hours of dry time between coats. Clean the door first with a degreaser if it’s been years since the last paint job, and remove the hardware rather than taping around it for a cleaner result. It’s one of the cheapest facelifts a house can get, and it costs less than a single throw pillow from a home decor store.
Repaint the interior in neutral, buyer-ready colors
Image Credit: Shutterstock
Interior paint was the single most common project sellers tackled before listing last year, done by nearly a third of them, and it’s not hard to see why. Nail holes, scuffed baseboards, and years of accumulated wall grime show up clearly in listing photos and video tours in a way they never do in daily life.
Color choice matters more than most homeowners assume. One analysis found that an olive green kitchen sold for an extra $1,600 compared to other colors, while stark white kitchens actually underperformed warmer neutrals. The lesson isn’t to chase one trendy shade everywhere. It’s that a considered, current color palette comes across as more valuable than the beige everyone associates with a rental unit.
Focus on the rooms buyers weigh most: the kitchen, the primary bedroom, and the main living space. A gallon of quality paint runs $30 to $60 and covers roughly 400 square feet, so a full room typically costs under $150 in materials if you do the labor yourself. Patch nail holes first, prime over any dark or saturated existing colors, and use a semi-gloss on trim so it holds up to cleaning.
Give the exterior a fresh coat of paint
Image Credit: Shutterstock
Painting the whole exterior costs more than most items on this list, averaging around $3,177 nationally, but real estate agents rank it as the single most recommended project for sellers to complete before listing, ahead of new flooring, bathroom work, and even roofing.
The reason is visibility. Every buyer sees your exterior before anything else, whether they’re scrolling listing photos at midnight or driving past on a Sunday afternoon. Chalky, faded paint or peeling trim signals deferred maintenance even when the structure underneath is fine, and buyers tend to assume the worst about what they can’t see once they’ve noticed what they can.
You don’t have to repaint every year to get the benefit. A quality exterior paint job holds up for 5 to 10 years depending on the material and climate, which makes the cost easier to justify even if you’re not selling anytime soon. If a full repaint is out of budget this year, prioritize the trim, shutters, and any bare wood surfaces, since rot spreads fast once paint stops protecting what’s underneath.
Paint or reface your kitchen cabinets instead of replacing them
Image Credit: Shutterstock
A full cabinet replacement runs anywhere from $2,000 to $30,000 depending on materials and kitchen size, which puts it out of reach for a lot of budget-conscious homeowners. Refacing, where the boxes stay and only the doors and drawer fronts change, costs $900 to $6,000 and gets most of the visual impact for a fraction of the price.
Painting goes even further. A professional cabinet paint job typically runs $3,000 to $6,000 for a standard kitchen, and a careful DIY version can come in well under $500 in supplies if you’re willing to do the sanding, priming, and multiple thin coats a good finish requires. Dated oak or cherry cabinets from the 1990s and early 2000s age a kitchen in listing photos more than the countertops or appliances buyers actually spend money to replace.
Sand lightly, use a bonding primer made for cabinetry, and give yourself a full week if you’re doing it yourself, since rushed dry time between coats is the most common reason a cabinet paint job looks amateur instead of professional.
Swap the cabinet and drawer hardware
Image Credit: Shutterstock
Hardware sounds like a footnote next to a full cabinet update, but it’s one of the simplest projects on this list for a beginner to finish in an afternoon with a drill and a tape measure. Installing new knobs and pulls throughout an average kitchen costs about $300 professionally, and less than half that if you do it yourself and buy hardware on sale.
The visual payoff is bigger than the price tag suggests. Builder-grade brass or dated oil-rubbed bronze pulls date a kitchen almost as fast as the cabinets themselves, and matching black or brushed nickel hardware across every door and drawer creates a sense of intentional design even if nothing else in the kitchen has changed.
Measure your existing hole spacing before you order, since pulls and knobs come in different hole-to-hole distances and mismatched spacing means drilling new holes or living with the old ones showing. If your current hardware uses a single center hole, buying replacement knobs is nearly foolproof. Switching from knobs to two-hole pulls is where most DIY projects go sideways, so measure twice before you touch the drill.
Update outdated light fixtures
Image Credit: Shutterstock
Lighting gets overlooked because it works even when it looks tired, so homeowners live with a dated fixture for years before noticing how much it ages a room. Swapping a single indoor fixture runs $158 to just over $1,000 installed depending on the type, while replacing a porch or entry light typically costs $65 to $250 per fixture.
Brass fixtures with frosted glass globes, a staple of homes built before 2010, read as immediately outdated next to a matte black or brushed nickel replacement. The entry light carries more weight than people expect, since it’s often the only exterior light a buyer sees clearly in evening listing photos or a dusk showing, and a rusted or yellowed fixture undercuts a freshly painted door faster than almost anything else on this list.
If your electrical box and wiring are already in good shape, a fixture swap is one of the more approachable electrical projects for a confident DIYer, since it usually involves the same two wires and a ground rather than new wiring runs. When in doubt about your home’s wiring age, hire an electrician. It’s a small cost next to the risk of doing it wrong.
Tidy the landscaping and lay fresh mulch
Image Credit: Shutterstock
Landscaping was among the most common projects sellers took on before listing last year, and real estate agents overwhelmingly back that instinct. The vast majority recommend improving curb appeal before a home goes on the market, and nearly all of them consider it important to how buyers respond during a showing.
None of this requires a landscape designer. Fresh mulch along the foundation and walkway beds runs a modest amount per cubic yard and instantly looks maintained, even over plantings that are a few years overdue for a trim. Edge the lawn where it meets the driveway and walkways, pull weeds from cracks and beds, and cut back anything blocking windows or the front door, since overgrown shrubs read as neglect even on an otherwise well-kept property.
Skip expensive additions like water features or elaborate hardscaping if resale value is the goal. Buyers consistently respond better to a simple, well-maintained yard than an elaborate one that hints at ongoing upkeep costs. A weekend spent mowing, edging, mulching, and trimming does more for how a house is perceived than almost any other project on this list, and it costs closer to $100 than $1,000.
Seal driveway cracks and update your house numbers
Image Credit: Shutterstock
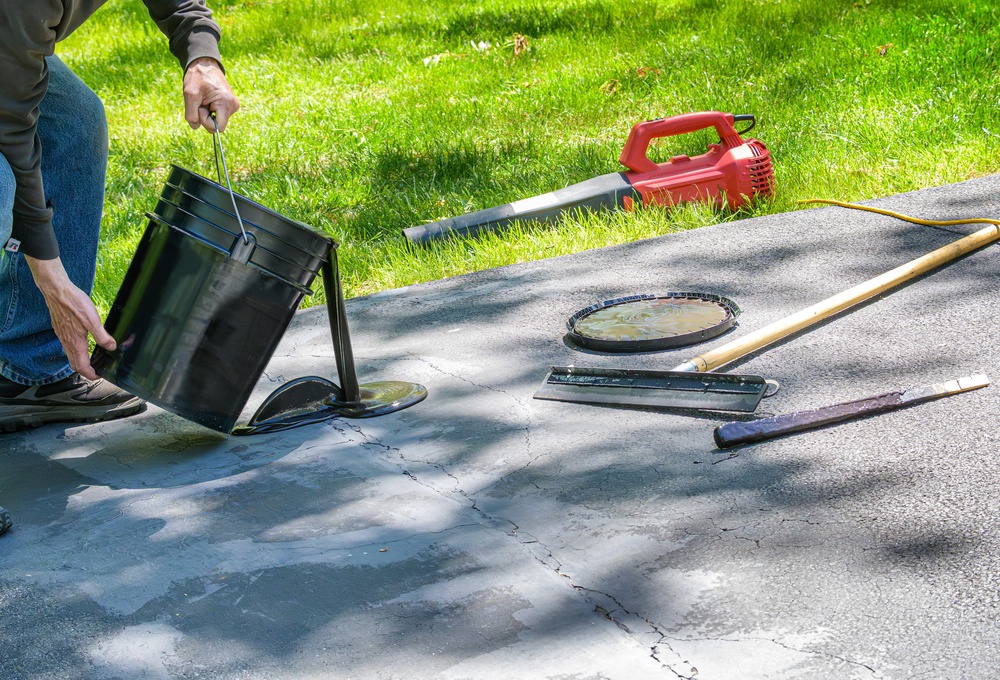
Some of the cheapest fixes on this list live at the edge of the property, in the details buyers notice without consciously registering why. Sealing hairline cracks in a driveway or walkway and swapping tired, mismatched house numbers are both projects flagged as effective, low-cost updates that fit into a single weekend.
A tube of concrete crack filler costs a few dollars at any hardware store and takes an afternoon for a typical residential driveway, well before the cracks widen enough to need a full resurfacing job that runs into the thousands. House numbers are even simpler. Modern, matching numerals in a finish like matte black or brass cost under $50 for a full set and take twenty minutes to install with a drill and a level.
Both projects share the same logic. Neither one is going to move an appraisal on its own, but they remove small signs of neglect that add up in a buyer’s mind during a drive-by or a listing photo scroll. A cracked driveway and mismatched numbers raise questions about maintenance even when the roof and foundation are in perfect shape.
Make small bathroom updates instead of a full remodel
Image Credit: Shutterstock
A full bathroom remodel averages more than $26,000 nationally and recoups about 80 percent of that at resale, which makes it one of the weaker investments if resale value is your main goal. More than a quarter of sellers made bathroom improvements before listing last year, but the ones that paid off were rarely full renovations.
When deciding how to price your home to sell, compare similar properties in your area and consider whether smaller repairs could make your home more competitive without the cost of a full remodel.
Re-caulking or reglazing a tub costs a fraction of replacing it and removes the yellowed, moldy caulk line that makes an otherwise clean bathroom look neglected. Swapping a dated vanity light, especially the multi-bulb glass-globe fixture common in homes built before 2005, modernizes the whole room for under $150 in most cases. New matching towel bars, a toilet paper holder, and cabinet hardware round out the refresh for another $50 to $100.
None of these projects require touching plumbing or tile, which keeps both the cost and the risk of something going wrong low. Save the full gut renovation for a bathroom you plan to use for years, not one you’re updating purely to help a sale.
Deep clean or refinish the flooring
Image Credit: Shutterstock
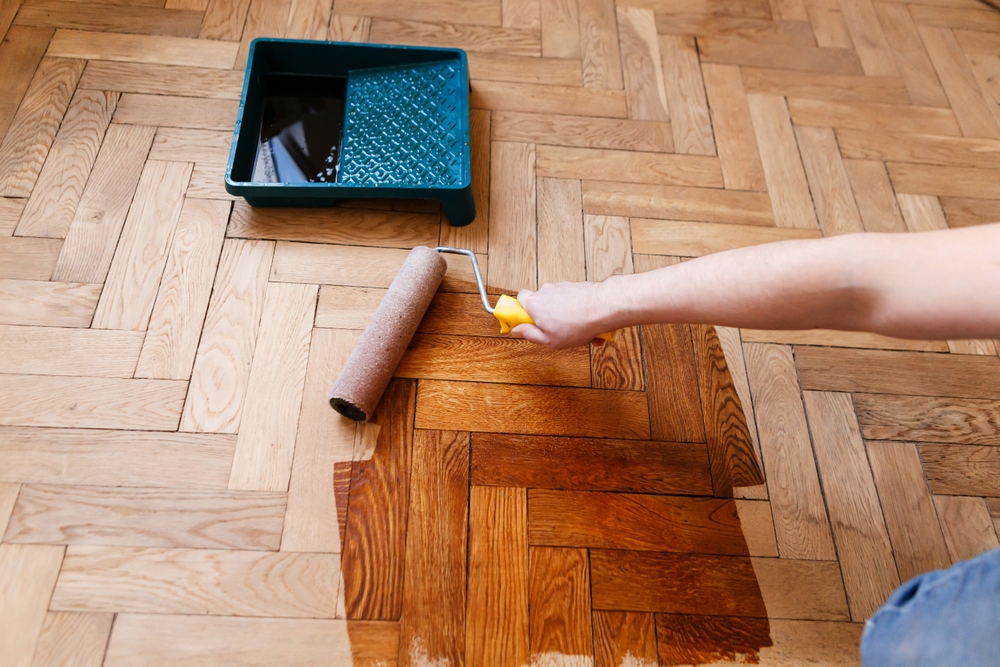
Roughly a fifth of sellers repaired or replaced flooring before putting their home on the market last year, but replacement isn’t always necessary. A deep clean and, where needed, a professional refinish gets most homes most of the way there for a fraction of the cost of new flooring throughout.
Hardwood floors with surface scratches and a dulled finish often look new again after a light sand and a fresh coat of polyurethane, a process called screening that costs far less than a full refinish since it doesn’t remove the wood down to bare grain. Carpet, meanwhile, responds dramatically to professional steam cleaning, especially in homes with pets, and it’s one of the fastest updates you can schedule the same week you list.
Stains that won’t lift, matted traffic patterns near doorways, or flooring that’s visibly different between rooms are the ones worth spending money on. Everything else, the dust, minor scuffs, and general wear of a lived-in home, usually comes out with a deep clean rather than a replacement, and buyers can’t tell the difference in photos or a walkthrough either way.
Handle the small repairs before anyone tours the house
Image Credit: Shutterstock
Peeling wallpaper, a leaky faucet, cracked tile, and overgrown landscaping are specific repairs flagged as the ones to fix before a buyer walks through, and they share a common thread: none of them are expensive, but all of them raise questions a buyer wasn’t planning to ask.
A running toilet or dripping faucet looks like a plumbing problem even if it’s a ten-dollar washer, and buyers who spot one small unresolved issue tend to look harder for others, sometimes finding problems that were never actually there. This is less about vanity and more about controlling the narrative. A house that shows well tells a buyer the owner paid attention, which makes them trust the parts of the house they can’t personally inspect.
Walk your own house the way a stranger would, room by room, and write down anything that catches your eye: a chipped switch plate, a sticking door, a stained ceiling tile from a leak that was fixed years ago. Clear the counters and closets while you’re at it. Most of this list gets resolved with a Saturday, a toolbox, and under $100 in hardware store supplies.
Pressure wash the house, driveway, and walkways
Image Credit: Shutterstock
Years of dirt, pollen, and algae buildup happen slowly enough that most homeowners stop noticing their own siding has gone gray, until a freshly washed neighbor’s house makes the difference obvious. Washing an entire house exterior averages $311 professionally, while driveways alone typically run $100 to $250, making this one of the highest-impact projects per dollar on this list.
The transformation is immediate in a way painting isn’t. There’s no drying time, no color decisions, and no risk of clashing with existing trim, just the original color and texture of your siding, brick, or concrete restored to what it looked like when it was new. Vinyl and brick tolerate standard pressure washing well, but wood siding, painted surfaces, and roof shingles need a lower-pressure soft-wash approach with a cleaning solution instead of brute force, since high pressure can strip paint or force water behind siding panels.
Rent a pressure washer for about $50 to $100 a day if you want to do it yourself, or hire it out if your home has more than one story, since ladder work on a wet, slippery surface is where most DIY pressure washing injuries happen.
Install a smart thermostat
Image Credit: Shutterstock
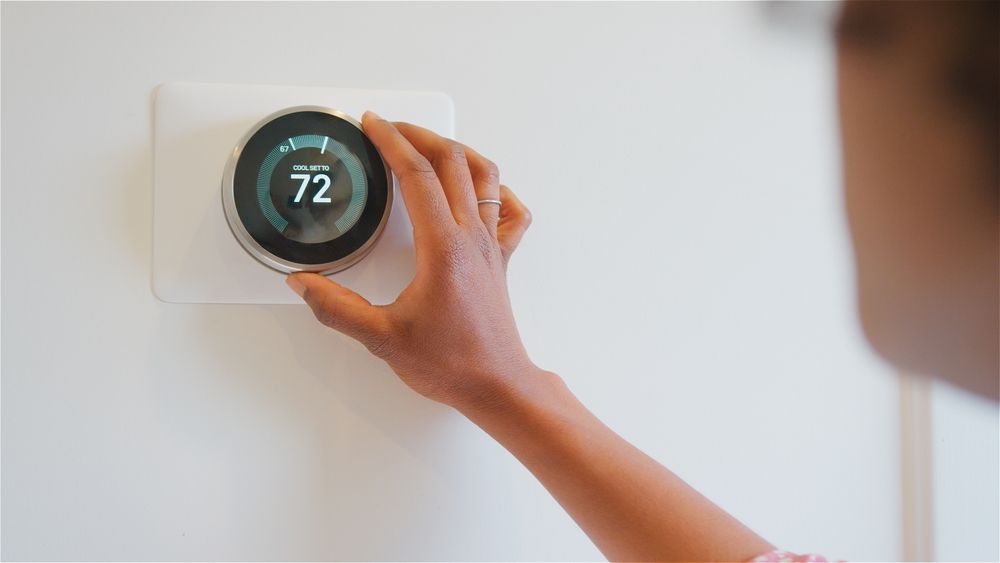
A smart thermostat costs $130 to $280 for the device itself, plus installation if you’re not comfortable working with low-voltage wiring, and it pays for itself through smaller, steady savings rather than one dramatic number. A certified smart thermostat saves the average household about 8 percent on heating and cooling costs, roughly $50 a year, with some households seeing more depending on climate and how much the house was over-conditioning before.
Buyers care about this beyond the energy bill. More than a third of buyers rated smart home features as highly important in a recent national survey, and a thermostat is the most visible, least gimmicky smart device to point to during a showing, compared to smart locks or lighting systems that can read as extra complexity to a skeptical buyer.
Most models install in under an hour if your home already has a common wire, which most homes built after 1990 do. If yours doesn’t, some models work around that limitation with a separate adapter, so check compatibility before you buy rather than after you’ve already opened the box and started pulling wires.
Seal and insulate the attic
Image Credit: Shutterstock
Heat rises, and in a lot of older homes, it escapes straight through an attic with insulation that has settled, shifted, or never met modern standards to begin with. Sealing air leaks around the attic hatch, plumbing stacks, and light fixtures, combined with topping off thin insulation, can cut heating and cooling costs by an estimated 15 percent, and total energy costs by roughly 11 percent.
This is one of the few projects on this list where the payoff compounds every month you own the home, not just at the moment of sale. A properly sealed and insulated attic also cuts down on ice dam problems in cold climates and keeps upstairs bedrooms noticeably more comfortable in summer, which matters if you’re not selling anytime soon and just want a house that costs less to run.
DIY blown-in insulation kits are available at most hardware stores for homeowners willing to work in a cramped attic space, though hiring an insulation contractor for a basic attic top-off typically costs less than most people expect, especially next to bigger jobs like wall insulation or whole-house spray foam.
Weatherstrip and caulk doors and windows
Image Credit: Shutterstock
A tube of caulk costs about $5, a roll of weatherstripping runs $10 to $20, and together they solve a problem most homeowners blame on their furnace or air conditioner instead of the actual source: gaps around doors and windows that let conditioned air leak straight outside.
Caulking and weatherstripping are among the few home upgrades that typically pay for themselves within a year, since the materials cost so little and the work is well within reach of most homeowners with a caulking gun and a free afternoon. Check around window frames, exterior door thresholds, and anywhere a pipe or cable passes through an exterior wall, since these are the spots where old caulk cracks and weatherstripping compresses flat and stops sealing anything.
The dollar bill test works surprisingly well for doors. Close the door on a dollar bill and try to pull it out. If it slides out easily, the weatherstripping needs replacing. This is the cheapest project on this list by a wide margin, and most people can finish it before dinner on a Saturday afternoon.
Renovate or organize your closets
Image Credit: Shutterstocl
Closet renovation shows up in national survey data as one of the highest cost-recovery projects homeowners can take on, second only to a new steel front door, recovering an estimated 83 percent of what it costs at resale. That’s a striking number for a project that doesn’t touch a single load-bearing wall or require a permit in most areas.
Storage sells houses in a way that’s easy to underestimate until you watch buyers open closet doors during a showing, which they do in almost every house they tour. A wire shelf sagging under the weight of winter coats looks like inadequate storage even in a house with plenty of square footage, while a closet system with defined sections for shoes, hanging clothes, and shelving comes across as move-in ready and organized.
Wire and laminate closet systems from a home improvement store cost a few hundred dollars per closet and install in a weekend with basic tools. A full custom build-out with drawers and specialty hardware costs considerably more but isn’t necessary to get most of the visual and functional benefit that shows up in buyer surveys.
You just turned 50, and somewhere between the cake and the jokes about middle age, you found yourself logging into your bank account to see where you actually stand.
Here’s the real number. The average person in the 45 to 54 age bracket has $71,130 sitting in checking, savings and money market accounts combined. The typical person, the one in the middle of the range rather than pulled up by a handful of wealthy households, has closer to $8,700.
That is not a typo. Averages and typical amounts tell two different stories, and which one you compare yourself to changes the whole picture.
The $71,130 figure also isn’t what most people picture when they hear “money in the bank.”
When researchers ask how much money people have “in the bank,” they mean checking accounts, savings accounts, money market accounts and prepaid debit cards, added together. Your 401(k), your house, your car and any stocks you own don’t count here. This is strictly the cash you could pull out today if you needed it, nothing more.
Across every household in the country, regardless of age, that number averages $62,410, while the typical household holds $8,000. People in their late 40s and early 50s sit a bit above both figures, which fits with these years usually being peak earning years, before college tuition or a health scare starts pulling that number back down.
Keep that distinction between average and typical in mind for every number in this article. The average gets dragged up by a relatively small number of large balances, sometimes just one very wealthy household in a survey sample. The typical number, sitting in the middle of everyone’s actual balance, is usually the more honest comparison point if you’re wondering how your own account measures up.
How the number changes by age
Image Credit: Shutterstock
Move down a decade and the picture looks different. People under 35 hold $20,540 on average, with a typical balance of $5,400. By the late 30s and early 40s, that climbs to $41,540 average and $7,500 typical.
Once you hit 55 to 64, the average balance keeps climbing to $72,520, but the typical balance actually slips slightly to $8,000, a touch lower than what 45 to 54 year olds hold. That’s one of the only spots in the data where an older group’s typical balance drops below a younger one, and it likely reflects people in their late 50s already drawing down cash for early retirement, college tuition or aging parents. People 65 to 74 hold the most cash of any age group, averaging $100,250 with a typical balance of $13,400. After 74, both numbers pull back down to $82,800 average and $10,000 typical.
Fifty sits right in the middle of that curve, past the building years and short of the peak that comes with a couple more decades of saving and a paid off mortgage.
What retirement accounts add to the picture
Image Credit: Shutterstock
None of the numbers above include retirement accounts, which get tracked separately. For the 45 to 54 age group, the average 401(k) and IRA balance combined comes to $313,220. The typical balance sits much lower, at $115,000. A relatively small number of high balance accounts pull that average up well past what most people actually have.
One widely used retirement rule of thumb calls for six times your annual salary saved by 50. Someone earning $75,000 a year would be aiming for $450,000. Measured against that yardstick, plenty of people in this age bracket are behind, including people who’ve done everything reasonably right, and roughly one in four Americans has no dedicated retirement account at all.
This is the part most people forget to add back in when they compare bank balances. Someone with $8,700 in checking and savings but $300,000 in a 401(k) is in a completely different position than someone with the same $8,700 and nothing else.
Your net worth is the bigger number
Image Credit: Shutterstock
Bank balances and retirement accounts are only part of the picture. Net worth adds in everything you own, including home equity, vehicles and any investments, then subtracts everything you owe, from a mortgage balance to credit cards to any student loans you’re still carrying. For the 45 to 54 age group, the typical net worth comes to $247,200.
That figure climbs steadily with age. People 35 to 44 typically have $135,300 in net worth. By 55 to 64, that number rises to $364,500. Most of the growth in your 50s comes from paying down a mortgage and watching a retirement account compound, not from a sudden jump in income.
If your own net worth looks nothing like $247,200, home ownership status usually explains a lot of the difference. Someone who bought a house 15 years ago and someone who has rented the whole time can end up with wildly different numbers even on identical incomes, since home equity typically makes up the single largest piece of that net worth figure.
How many people could handle an emergency
Image Credit: Shutterstock
Here’s a more useful question than how much sits in your account: could you actually handle a financial surprise? Among adults 45 to 59, 62% say they have enough saved to cover three months of expenses, down slightly from 64% two years earlier. Nationally, 63% of adults could cover a $400 emergency using cash or its equivalent, a share that has barely moved since 2022.
Financial planners usually translate three months of expenses into a dollar figure based on typical household spending, which lands most families somewhere between $18,240 and $36,480. Put another way, well over a third of people would have to put an emergency on a credit card, borrow the money, or skip paying something else. That’s not a personal failing. Housing costs, health care and the cost of raising kids have all climbed faster than wages for most of the last two decades, and a bank balance on its own doesn’t show any of that context.
What helps if you’re behind
Image Credit: Shutterstock
If you’re 50 or older, the tax code gives you one real advantage: catch-up contributions. In 2026, you can put an extra $8,000 into a 401(k), 403(b) or most 457 plans on top of the regular limit, bringing your total to $32,500 for the year. IRAs get a smaller boost, an extra $1,100 a year.
There’s a new wrinkle starting in 2026. If you earned more than $150,000 in FICA wages the previous year, your catch-up contributions have to go into a Roth account instead of a traditional one, which means paying tax on that money now instead of when you withdraw it later.
Outside of retirement accounts, the fastest fix for a low bank balance is usually the most boring one. Move idle cash out of a checking account paying nothing and into a high-yield savings account paying several percent, then automate a transfer every payday so saving doesn’t depend on willpower.
Wherever you land in these numbers, the comparison matters less than the direction you’re heading. A 50-year-old with $8,700 in the bank and a plan to add to it is in better shape than a 50-year-old with $71,130 and no plan at all.
You know the color even if you don’t know the name. That milky green mixing bowl in your grandmother’s cabinet, the diner mug with the thick walls that never seemed to chip, the little cup and saucer set that turned up in a box of oatmeal decades ago. That’s Fire-King, the Anchor Hocking glass line that ran from 1942 to the mid-1970s, and it is one of the most actively collected kitchen glass categories in the country.
Jade-ite, the milky jade green shade, gets most of the attention, but Fire-King made dozens of patterns in ivory, turquoise blue, peach lustre, and the rare, pale Sapphire Blue that predates the Fire-King name itself. Some of it is genuinely rare. Most of it is not, and that is good news if you are digging through a thrift store bin rather than bidding at a specialty glass auction.
What separates a five-dollar plate from a five-hundred-dollar mug usually comes down to the pattern, the specific piece, and whether it is marked or not. A lot of Fire-King left the factory unmarked, which means condition and pattern knowledge matter more than a stamp on the bottom. Here are 12 pieces worth knowing, from the everyday to the genuinely hard to find.
Anchor Hocking made these thick, straight-sided mugs for diners, hospitals, and cafeterias from the late 1940s through the 1960s, and they are still the single most common piece of jadeite you will run into at an estate sale. A clean, chip-free mug with no cracks around the handle typically brings $10 to $25 on its own. Matched sets sell for noticeably more than the same mugs bought separately, since collectors building a full diner set will pay a premium for uniformity.
The handle shape is worth knowing. D-handle mugs have a flat-backed handle, while C-handle mugs curve into a full loop, and both turn up regularly. Neither shape moves the price much on its own, but condition does. Check the base of the handle for hairline cracks, which are common on a mug that size after decades of stacking and washing.
Watch out for decorated versions. Some sellers apply modern decals to plain jadeite mugs to make them look like vintage advertising pieces from old diners or gas stations, then price them as if they were original. If the graphics look too crisp for the age of the glass, ask for more photos before buying.
Fire-King Jane Ray jadeite dinner plate and cup and saucer
Image Credit: RosieFleur via Etsy
Jane Ray is the pattern most new collectors start with, and for good reason. It was given away for years with bags of flour and boxes of oatmeal, which means it is everywhere. The rayed border and plain center make it easy to spot on a shelf. A dinner plate in good condition typically brings $10 to $20, and a cup and saucer set runs about the same.
The rare pieces are what make this pattern worth a second look. The demitasse cup and its matching saucer barely turn up for sale. The 6 ¼ inch bread and butter plate is genuinely scarce, and the flat-rimmed 9 inch soup bowl is the piece serious Jane Ray collectors chase hardest. A complete boxed starter set, sold originally as a “Jadeite Fire-King Heat Proof Starter Set,” is a nice find if the box has survived along with the glass.
Since Jane Ray was made for close to two decades, the mark on the bottom changes depending on when a piece was produced. Some pieces say nothing at all. Don’t assume an unmarked plate is fake just because it has no stamp; check the pattern and the color instead.
Fire-King jadeite double egg cups
Image Credit: TheAntiqueBaron via Etsy
These small double-sided cups, wide at both ends so you can crack an egg into either side, are one of the more overlooked pieces of jadeite kitchenware. They rarely show up in general “vintage glass” bins because most people don’t recognize what they are, which works in your favor if you know to look. A single cup in good condition typically brings $10 to $20, and matched pairs or small lots sell for meaningfully more per piece than a solo cup.
Condition matters more here than on most jadeite because the cups are small and thin-walled at the rim, which is where chips tend to happen. Run a finger carefully around both openings before buying.
The main authentication trick with any jadeite is the blacklight test. Genuine Fire-King jadeite does not glow under UV light. If a green glass egg cup fluoresces bright, it is likely older uranium-era glass from McKee or Jeannette rather than Fire-King, which is a different collectible in its own right but not what you are paying jadeite prices for. When color alone is ambiguous, the glow test settles it in seconds.
Fire-King Turquoise Blue “Hostess Delight” snack set
Image Credit: M.J.S.Supplies&More via eBay
Not every Fire-King line is green. Turquoise Blue, an opaque teal color, was Fire-King’s answer to the 1950s party circuit: a small snack plate with a matching teacup, usually finished with a gold rim, meant for balancing on your knee at a bridge game or a cocktail hour. A single cup and plate set in clean condition typically brings $10 to $20, gold rim intact and no cloudiness in the color.
Complete boxed sets of eight, marketed originally as “Hostess Delight,” are harder to find intact and change hands for meaningfully more than the same number of pieces bought individually, especially with the original box.
The biggest risk with turquoise Fire-King is confusing it with lookalikes. McKee, Federal Glass, and Hazel Atlas all made similar teal-colored glass in the same era, and none of it carries Fire-King prices. Check the base for “Fire-King” or “Fire King Oven Ware” in raised letters. Gold rim wear is normal and expected; heavy wear that has gone silver or worn through to bare glass brings the price down noticeably.
Fire-King Charm turquoise blue square dinner plate
Image Credit: LucysMidCentury via Etsy
Charm is the only square-shaped pattern Fire-King ever made, and it stands out instantly next to the round plates in a Jane Ray or Swirl set. It came in jadeite and in turquoise blue, and it was only produced for a handful of years in the late 1940s and early 1950s, which keeps supply tighter than most other patterns. A turquoise Charm dinner plate in clean condition typically brings $15 to $30.
The salad bowl had to be bought separately from the original luncheon set, which means it shows up less often today than the plates and cups. The rarest piece by a wide margin is the 11 by 8 inch platter; it barely surfaces for sale, and when it does, collectors notice.
Most Charm pieces left the factory unmarked, so don’t rule out an unstamped square plate just because the bottom is blank. Check the shape and the rayed pattern on the underside instead. A plate with even color, no cloudy patches, and a corner free of chips is what you want; corners on square pieces take the brunt of chip damage that rounded plates avoid.
Fire-King Alice pattern jadeite cup and saucer
Image Credit: OurVintageStuff via eBay
Alice has one of the better stories in the Fire-King catalog. Quaker Oats packed the cup and saucer into oatmeal boxes as a free premium in 1945, which is why the small floral pattern turns up so often paired with a cheerful memory of somebody’s grandmother’s cupboard. A clean cup and saucer set typically brings $15 to $25.
Because the cups and saucers were free, they survived in bigger numbers than the rest of the Alice line. The dinner plate is a different story. Since it had to be bought on its own to round out a full place setting, far fewer left the factory, and it commands a real premium over the giveaway pieces. A complete matching creamer and sugar set is similarly hard to track down and worth chasing if the price is fair.
Alice pieces are often unmarked, so identification comes down to the pattern itself: a delicate ring of small flowers and leaves around the rim of the cup, saucer, and plate. If you see that floral border on jadeite, you have found Alice regardless of what the bottom says.
Fire-King jadeite range set with tulip lids
Image Credit: BrocanteMitchVintage via Etsy
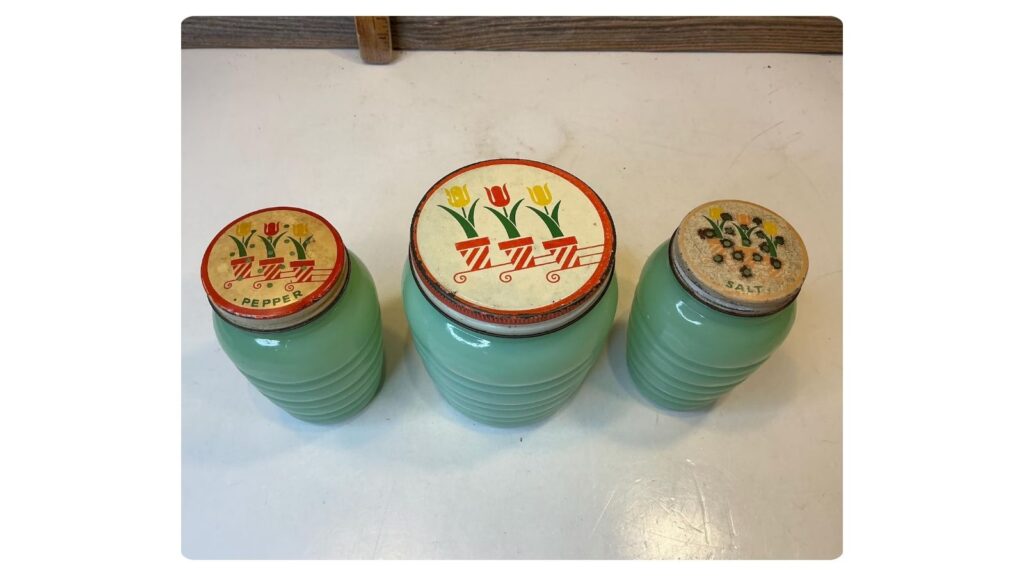
This is the grease jar and matching salt and pepper shaker set that used to sit on the back of the stove in a lot of American kitchens, and it is one of the more surprising values in the whole Fire-King lineup. A complete three-piece set with the tulip-shaped lids intact and no chips typically brings $150 to $275, which catches a lot of first-time sellers off guard.
The lids are the weak point. They are thinner than the jars themselves and were handled daily, so a set with all three lids present and undamaged is worth substantially more than one missing even a single lid. Rust staining on the metal-free glass lids is not typical; check for actual glass chips along the rim where the lid meets the jar.
Reproduction risk is real here. Fakers have been known to take genuine blank vintage shakers from other manufacturers and add lettering or graphics to mimic an original range set. If the printing looks unusually crisp or the jar shape doesn’t match reference photos exactly, get a second opinion before paying full price.
Fire-King Wheat pattern covered casserole
Image Credit: TheMilkGlassPalace via Etsy
The Wheat pattern, sometimes called Golden Wheat, dresses up plain white milk glass with a stalk of wheat rendered in gold. It was a wedding registry staple through the 1960s, and it survives in large enough numbers that you can still build a full set without much trouble. Small loaf pans and one-quart casseroles bring $10 to $20 in good condition, while larger covered casseroles with the lid still intact reach $25 to $35.
The gold decoration is the part to inspect closely. It was applied on top of the glass rather than fired underneath it in most cases, which means decades of dishwasher cycles can wear it down to a ghost of the original pattern. A dish with crisp, unworn gold is worth meaningfully more than one where the wheat has faded to a faint outline.
Completeness matters more here than on open bakeware. A casserole missing its lid is worth a fraction of a matched pair, so check that the lid’s shape and rim actually match the base before assuming they belong together.
Fire-King Anniversary Rose creamer and sugar set
Image Credit: thecherrychic via Etsy
Anniversary Rose dresses up Fire-King’s Swirl-shaped milk glass with a soft pink floral print and a band of gold trim, and it has the kind of old-fashioned, feminine look that photographs beautifully on a shelf. A matching creamer and open sugar bowl in good condition typically brings $15 to $40, depending on how much of the gold trim has survived intact.
Complete dinnerware sets in this pattern, plates, bowls, cups, and saucers together, are less common than the smaller serving pieces, since sugar and creamer sets tend to survive daily use better than a full stack of plates. If you find a larger lot with the gold trim consistent across every piece, it is likely a set that stayed together its whole life rather than one assembled later from mismatched pieces.
Check the gold trim before anything else. Hand washing kept it intact; a dishwasher will strip it to bare glass within a few dozen cycles, and heavily worn trim cuts the value close to in half compared to a crisp example.
Fire-King Game Birds tumblers and mugs
Image Credit: CHOCOLATE SOUP 2002 via eBay
Not every Fire-King piece is dinnerware. The Game Birds line put hand-painted ducks, pheasants, geese, and grouse on plain white milk glass tumblers and mugs, aimed squarely at the hunting cabin and lodge crowd of the 1950s and 60s. A single tumbler or mug in decent condition typically brings $8 to $15, but a set of four with four different birds is worth more than four times a single piece, since collectors specifically want the full run of species.
The paint is fired on rather than a sticker, which is good news for durability, but decades of dishwasher use still fade the finer feather detail over time. Look for crisp black outlines and full color saturation rather than a washed-out silhouette.
This pattern gets confused with several other hunting-themed glass lines from the same era, including pieces by Hazel Atlas and Federal Glass. Check the base for a Fire-King mark to confirm what you actually have before pricing it as part of this specific set.
Fire-King Peach Lustre Laurel Leaf dinner plate
Image Credit: CharliePantsVintage via Etsy
Peach Lustre is the warm, amber-pink iridescent finish Fire-King applied over crystal glass starting in the early 1950s, and the Laurel Leaf pattern, with its ring of molded leaves around the rim, is the most common form you will find it in. A dinner plate in clean condition typically brings $10 to $18, a modest step below what the same shape brings in jadeite.
Because Peach Lustre is less hunted than jadeite, it is a genuinely good category for someone who wants real vintage Fire-King without competing against a crowded collector market. Full sets with matching cups, saucers, and serving pieces do turn up at estate sales fairly often, and they tend to be underpriced relative to how complete they are.
The iridescent finish is the fragile part. It can dull or develop a cloudy film after years in a dishwasher, and once that shine is gone it does not come back. Hold a piece up to the light and look for an even, warm glow across the whole surface rather than patchy dullness before deciding it is in top condition.
Fire-King jadeite ball jug
Image Credit: RosieFleur via Etsy
The ball jug is the piece serious Fire-King collectors mention first when the conversation turns to rarity. It is a round, tilting pitcher with a distinctive spherical body, made in small numbers as part of the original Restaurant Ware line, and genuine examples in decent condition regularly bring $300 to $600, with worn or lower-condition examples still selling for meaningful money.
This is also one of the most heavily reproduced pieces in the entire Fire-King catalog. A company called Gibson has made a very close copy for years, and because both the original and the reproduction are typically unmarked on the bottom, a Gibson barcode sticker on the base is often the only visible clue. Even the reproduction sells for a fair amount on its own, so a seller isn’t necessarily lying to you, but you should know which one you’re paying for.
If you come across one at an estate sale with no sticker and no obvious signs of recent manufacture, weight and glass quality are your best clues; genuine vintage jadeite tends to feel heavier and less uniformly colored than the newer copies.
If you’re one of the 5.2 million licensed drivers in Washington, it’s worth knowing that an SR-22 is not an actual insurance policy. It is a certificate of financial responsibility filed directly by your auto insurer with the Washington Department of Licensing to verify you carry required liability coverage.
If your driver’s license is suspended after a major traffic violation, keeping this filing on record helps keep your driving privileges intact. Understanding state mandate requirements, policy options, and cost structures makes navigating the reinstatement process straightforward.
Trigger events for financial responsibility filings
Washington state mandates an SR-22 filing when a driver is involved in serious traffic infractions or severe compliance failures. The primary triggers focus on driver safety and legal compliance on public roads.
Common causes include convictions for driving under the influence of alcohol or drugs, reckless driving, or driving with a suspended license. Failing to satisfy an unpaid court judgment resulting from a motor vehicle accident also triggers the requirement.
Thousands of license suspensions are issued every year for financial responsibility non-compliance across Washington state roads. This filing proves to state officials that high-risk operators remain financially accountable while behind the wheel.
Once the requirement is issued, you must maintain active filing status for three consecutive years. A single gap in coverage alerts the state immediately, resets your three-year timer to day one, and triggers a swift license suspension.
State coverage minimums and non-owner options
To satisfy state mandates, your auto insurance policy must meet or exceed specific minimum liability coverage limits under Washington law. You may carry higher limits, but dropping below these thresholds voids your compliance status.
Required minimum coverage amounts include:
$25,000 for bodily injury or death to a single person in an accident
$50,000 total for bodily injury or death to two or more people in an accident
$10,000 for property damage per individual incident
If you don’t own a motor vehicle but still need to restore your driving privileges, standard auto policies aren’t necessary. In this situation, purchasing a non-owner insurance policy satisfies state authorities while keeping costs lower.
Choosing SR-22 insurance in Washington under a non-owner endorsement provides liability protection whenever you operate borrowed or rented vehicles without paying for comprehensive or collision coverage. Carrying the proper endorsement prevents severe penalties while keeping your file active with state officials. Standard insurance carriers often charge a small upfront processing fee, usually between $25 and $50, to file the certificate directly with state agencies.
Managing premium costs and finding providers
Filing an SR-22 tags a driver as high-risk, which almost always raises annual insurance premiums. The rate increase stems from the underlying traffic violation, not the certificate itself.
Premiums can jump significantly depending on your specific driving record and the severity of the violation. Shopping around with multiple carriers is essential, as different insurance companies weigh risk factors using distinct pricing algorithms. Standard insurers might decline coverage altogether, requiring you to seek policy options from specialized non-standard insurance carriers.
To offset elevated premiums, drivers can adjust policy deductibles, remove unnecessary add-ons like roadside assistance, or qualify for safe driver programs over time. Comparing rates across several providers helps you secure reasonable coverage without overpaying during your mandatory three-year filing window. If you’re already on top of other budgeting habits, getting into comparison here is another important step.
Long-term compliance and policy reinstatement
Maintaining continuous coverage without lapses remains the most critical aspect of managing an SR-22 in Washington, especially if you’re reliant on your car to manage your work and life responsibilities. Insurance companies must report any policy cancellation or lapse immediately to state agencies using Form SR-26.
If a lapse occurs, your driving privileges are immediately suspended, and the three-year mandatory clock restarts completely upon renewal. Setting up automated payments with your insurance provider prevents accidental cancellations caused by missed due dates. Staying proactive helps you navigate your court-mandated period smoothly.
Once you successfully complete the three-year period without any coverage interruptions, contact state licensing officials to confirm your requirement has expired. You can then instruct your insurer to remove the endorsement, dropping high-risk filing fees and unlocking lower standard insurance rates. For additional assistance with many of life’s challenges, and advice across a range of topics that single mothers will enjoy learning about, stick around on our site.
Image Credit: Ortopediatri Çocuk Ortopedi Akademisi via Unsplash
Raising a child with a disability as a single mother brings unique daily rewards alongside demanding care duties. Balancing work commitments, household budgets, and specialized care plans requires practical routines that protect family stability. Implementing structured habits helps reduce stress in your home and supports your child’s growth.
Consistency creates a feeling of security for children who thrive on predictable patterns. Simple visual schedules on the fridge help your child anticipate transitions throughout the day without constant verbal reminders. Keeping morning routines clear and repeatable keeps the entire household running smoothly.
Single mothers living in South East Queensland often find that coordinating regional care services requires careful planning. Accessing reliable local disability care across Moreton Bay makes a significant difference when you need to align home routines with professional therapy. Having a dependable support team nearby gives you valuable room to focus on family needs.
Establishing clear start times for evening tasks like homework, baths, and bedtime creates a calm environment. When children understand expectations, daily tasks feel less chaotic for single moms managing full schedules alone. Predictable evenings allow you to recharge for the next day.
Encouraging independence through small steps
Encouraging self-reliance gives children confidence in their abilities and lightens the daily workload on single mothers. Breaking complex tasks into single, manageable actions allows your child to master new skills at a comfortable pace. Step-by-step guidance builds trust between you and your child.
Expert insights from Triple P Parenting show that setting realistic expectations and planning helps children master morning routines independently. Celebrating small milestones along the way reinforces positive habits and builds confidence. Consistency in praising effort helps children feel proud of their accomplishments.
Simple modifications like labeling clothing drawers with pictures or placing coat hooks lower allow children to dress themselves. Giving your child clear, manageable responsibilities nurtures personal growth and self-worth.
Starting early with targeted support
Early intervention provides children with valuable skills that make learning and communication easier during school years. Seeking targeted guidance during early childhood creates a strong foundation for long-term development.
Findings published by Foundations show that family support programs create the strongest positive outcome when started before age 6. Framework guidelines from the NDIS note that early skill building helps young children participate in daily community activities.
Connecting with speech or occupational therapists early in a child’s life prevents frustrating learning barriers later on. Single parents benefit greatly when early therapy providers share quick exercises to practice at home. Daily repetition of these exercises strengthens progress.
Adapting your home environment
Creating a calm, accessible living space helps reduce sensory overload and physical barriers for your child. Simple changes like lowering toy bins, organizing quiet sensory spaces, and keeping walkways clear make a big impact. A well-designed room encourages quiet self-directed play.
Research from the Australian Institute of Family Studies points out that adapting home environments supports a child’s sense of belonging. Guidance from the Raising Children Network highlights that children build independence through everyday activities alongside family in familiar places.
Designating specific zones for quiet play and homework helps children stay calm and focused. A well-organized living space saves time for single mothers during busy weekday mornings.
Connecting with regional resources
Navigating support systems solo can feel overwhelming, but connecting with local services lightens the burden. Reaching out to local assistance networks helps single mothers secure practical care and short-term respite. Working with local networks ensures your child receives well-rounded support.
Information from My Community Directory indicates that regional programs offer direct assistance with personal care and community involvement. Tapping into these structured services gives solo parents room to focus on career goals and self-care.
Building a strong network of professional support personnel transforms how you manage long-term care plans. Having dependable local resources reduces the emotional isolation many single mothers experience.
Smart time and financial management
Managing finances and time efficiently is critical when running a single-parent household. Focusing on key organizational habits helps protect your family budget and maintain steady routines.
Create a centralized digital calendar to track medical appointments, therapy sessions, and work schedules in 1 place.
Set aside 1 hour each Sunday to prep meals and assemble outfit bins for the upcoming school week.
Research dedicated assistance grants and tax relief options to offset recurring therapy expenses.
Partner with local parent support groups to trade respite care hours with other solo moms.
Small adjustments to your daily financial routine yield significant savings across the calendar year. Keeping a clear budget sheet prevents unexpected medical or therapy costs from disrupting family finances. Staying proactive with expenses provides lasting financial security.
Image Credit: Grab via Unsplash
Parenting a child with a disability as a single mother is a journey that demands patience, structure, and strong support networks. By creating predictable routines, encouraging gradual independence, and accessing local community resources, you build a stable environment where your child can thrive. Protecting your time and financial health ensures you remain strong, confident, and empowered as the head of your household.